Showing posts with label Good Working Practice. Show all posts

Friday, 6 May 2016

Project Evaluation

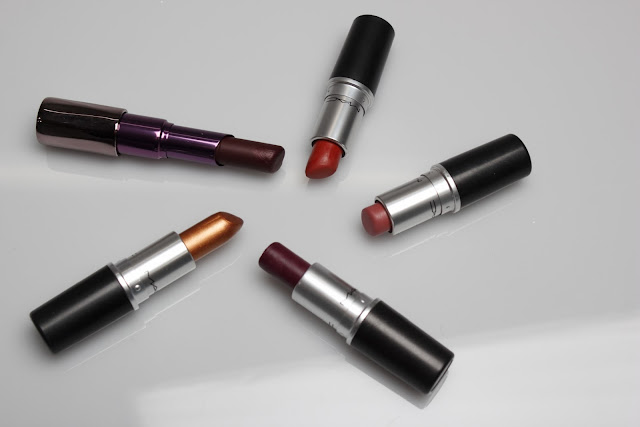
The aim of this project was to create an online forecasting space for the public in the form of a magazine that explores the upcoming hair and beauty trends for the season ahead.  The online magazine combines high fashion catwalk imagery as well as some of my own interpretations of future trends to bring together an overview of what can be expected within the beauty industry in the season to come.

Throughout the production of my final major project, I have grown as a creative practitioner and developed skills in multiple areas that I would not have comprehended before starting the project.  This project has allowed me to create an online space that explores the future of hair and beauty, through which was possible with extensive research and evaluating, henceforth introducing The Beauty Prophecy.

The final output of this project - an interactive, online, forecasting magazine.  The title The Beauty Prophecy was chosen to represent the element of forecasting in the magazine, as ‘prophecy’ means ‘a prediction that will happen in the future’.  Creating the online magazine single-handedly in three months has been an extremely ambitious and challenging task.  I knew that it would be tough and a lot of work, however I wanted to challenge myself, which the production of this project definitely has done.  From organising photoshoots and trying to find a willing team, to constructing the website for my online space, the production process has not been an easy one, especially as I have done a lot of it by myself due to having been let down by a lot of people.

Through undertaking research, I found that it helped me to gain a good background understanding of my concept and what should be expected of the online magazine.  I began my project by researching into current forecasts for Autumn Winter 16, as well as looking at the catwalk shows that took place in February.  I found that this helped and inspired me, because trends that I had intended to forecast in my magazine had also been seen on the catwalks, backing up my ideas.  The difference between my trends and those from the catwalk is the idea behind them.  For my forecasting magazine, I began by distinguishing an overall trend theme that would run behind and support the creative make-up and hair ideas that I devised.

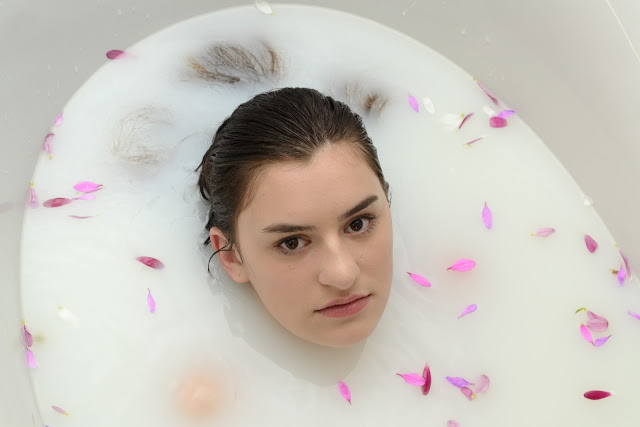
Successes within my project would have to be the majority of the photoshoots that I undertook to go on my website.  Overall I did seven photoshoots and two still life photoshoots, however not all of them made the cut for the final website.  Each set of images that was created were good and as I had hoped them to be, however when it came to putting the whole magazine together, not all of them fitted together nicely like I had expected them to.  Out of the seven photoshoots for the different looks, I only ended up using five image ranges.  This is because some of the models were a bit awkward in front of the camera, which is something that I should make sure for in the future when I am organising photoshoots.  Also, there were only a few small shots from my still life imagery that I was able to use in my magazine, due to the pictures being quite dark in a lot of them.  I think that this was because I had been let down by my photographer and so had to shoot the products by myself, and I had never shot still life before.  At the time I thought that I was doing well, until I got home and looked at the images in a larger format on my laptop.  This showed up a lot of errors in lighting and positioning of the camera when trying to shoot.

Although there have been some positives in the outcome of creating my magazine, there have also been a lot of things that could have been done better and with more time to spare, which would have resulted in a better final outcome of my project.  Key points of production that stand out to me for improvement are; sticking to my time schedule with better organisation, having reliable team members to help me out with my project, and being sure to achieve everything that I set out to do in the first place.

My organisation is usually not great, but throughout the production of this project it has been even worse than usual.  This can be put down to a number of things, but in my opinion the main reason for me falling so behind so quickly was because dissertation was still ongoing when I started this project.  I also feel that having the reflective blog alongside the major project has been overwhelming, as it is almost like having two projects at once.  I found that once I was slightly behind with my work, trying to catch up got harder and harder as the weeks went on, but my organisation is something that I am trying to improve on.  Similarly to this, I was unable to achieve everything that I had set out to do, due to my lack of organisation.  Examples of missing elements from my project would be the project social media platforms and a page from my website.

Alternatively, trying to organise a team to help me on specific dates has been really difficult.  I have been let down my numerous potential models, and the majority of my imagery has been shot by myself as I have not been able to find reliable, dedicated photographers.  However because of this, I do feel that I have learnt a lot about photography since the start of this project, and I feel a lot more confident taking photos now.  This said, I would still prefer to have the help of a photographer in the future, because they’re a lot more knowledgeable than I am.

The most challenging stage of the project was producing and developing the website that would hold my online magazine.  Originally I tried to get the help of a web designer because I thought that this would help to make my site look more professional.  When my contacting calls did not receive any response, I seeked John’s help with Adobe Muse.  Although Muse has created a lot of boundaries when it came to creating my website, I am proud that I managed to do it by myself, along with some of John’s help.  One of the main problems that I had with Muse was trying to get the navigation menu to scroll with the page as the reader scrolls through the website.  This was so frustrating as it was one of the key features that I wanted to be able to make the website’s pages easily accessible at all times for the viewer.  I had planned to give up and just deal with the fact that my menu was not going to scroll with the page, when John found the solution.  It turned out that I needed to have a fixed width in the version of Muse that I had downloaded, but when we changed the width settings it still did not work due to a glitch in my system.  We discovered that the sticky menu worked if we created a new website plan, so I transferred everything that I had already done into a new document.  This was not ideal, but it meant that I could have my desired scrolling menu, and I am very pleased that I made the decision to do so.

Further improvements could have been made to The Beauty Prophecy, had I allowed myself more time to do so.  I feel that the content of my magazine could have been a lot more detailed and that there could have been a lot more to it.  Although I am happy with what I have managed to produce, I just wish that I had produced more content, which is something that I’d like to explore.  As I am doing a Masters Degree next year, I think that this would be the perfect opportunity for me to continue to work on The Beauty Prophecy, by creating further issues and making the improvements that I wish I had allowed myself the time to do originally.

Friday, 29 April 2016

Website Problems

Since I have been creating my website, I have been faced with many difficulties.  When I began creating my website, I had a clear design idea that I wanted to stick by, however I am using Adobe Muse and some things that I would like to achieve do not seem to be possible.

MISMATCH BANNER LAYOUT
I was really happy with the logo that I had previously decided on, however having made it into a banner for my website I no longer think it fits with the theme of my magazine.  As a square logo I think that the design works well, though when it is translated into a banner and the square is so small in the middle, you lose the effect.  I also feel that it doesn't look as professional as I had hoped, which I think could be to do with the pink/purple coloured background.
Current Website Homepage
I also have grown to dislike the font that features in the logo, as when I have started to write features to be added to the website it does not look professional.  Therefore I think that I need to re-work the logo and banner so that they fit with the concept of my magazine and make it look more professional.


MENU TROUBLES
I wanted a banner with my logo across the top with a horizontal menu underneath.  When the viewer scrolls down the page, I want the menu to scroll to the top and then stay there as the rest of the page scrolls, so that the menu is always accessible for the reader, similar to the Get the Gloss website (see below).


However after googling for hours and seeking John's help, it seems that this is not possible, which is frustrating as I really wanted it to work.  I still want my menu to appear and stay at the top of the page when the reader scrolls through the website, so I have come up with some possible solutions to this problem:
      1) Pin the banner as well as the menu at the top of the page so that they both stay there when the reader scrolls.
      2) Change the design of my website.
Because I do not want to have a banner that scrolls with the page as well, and because the current banner design that I have is not working the way that I had envisioned, I think that my best option is to adapt the design of my website.

Wednesday, 27 April 2016

Still Life - Product Photoshoot 2


I am happy with how today's still life photoshoot went, although the images are not perfect.  I decided to do a second one because last time I focused a lot on the textures of the products rather than the products themselves.  Therefore I thought that it would be a good idea to conduct another still life shoot where I could focus on the products and create visuals of a selection of products that could work together for a make-up look.  I am unsure yet if I will use this idea within my magazine, but I wanted to have the images there in case I did decide that I wanted to include something like that.

I have found still life shooting very difficult, as it is a concept that I had never done before until this project.  I found it very difficult to get the lighting right, because I wanted the products laying flat on the surface but when I leant over with the camera to get a flat shot, a shadow was created in most images, which is something that I do not want featured on my website.  It was also difficult to get the brightness of the light right, as it reflected off of some of the products with metal areas.  In an attempt to overcome these difficulties, I adjusted the brightness of the flash and the shutter speed, however this then made the images too dark.  I also tried standing on a chair to be able to get a good flat view of the table, however this still caused some shadowing.

To correct these errors, I will use photoshop in post-production to bring up the brightness a bit and tone down the contrast to try and get rid of the shadows.  It's annoying because I like the style of the images and the ways that I arranged the products, but the lighting and shadows let the overall image down.  Therefore I am hoping to rectify this.

Tuesday, 19 April 2016

Eye & Lip Photoshoot

INSPIRATION
The moodboard above is a layout of inspiration for an eye and lip look that I shall be creating.  The theme behind the upcoming photoshoot will focus on glossiness, on both features.  For the lips, I want to create another dark berry lip, but this time with a more glossy texture which I plan to do by adding a clear lipgloss over the top of the lipstick colour.  For the eyes, I want to create a brown/nude colour and then I want to add vaseline over the top to create another glossy texture.  Although the glossy eye did not work very well last time, I am more confident about it for this photoshoot.  This is firstly because I am using a more neutral colour before adding gloss, and also because I will be using vaseline.  Vaseline is a softer product that will add the gloss, so I think that it will not crease and smudge as much as last time.

http://hairstyles-galaxy.com/wp-content/uploads/2015/11/slicked-back-long-hair-2016
https://uk.pinterest.com/muffinink/lipstick-lips/
http://www.urbandecay.co.uk
https://uk.pinterest.com/pin/496170083917060427/
http://www.omorovicza.com/uk/perfecting-lip-balm.html?___store=omorovicza_store_uk&___geoStore=omorovicza_store_uk


UNEDITED IMAGES


For this look, I was focusing on make-up for the eyes and lips, and I am happy with the final outcome.  I wanted to focus on glossy eye lids and lips, which I have achieved.  I chose to have a dark lip colour again to run with the classic theme of the Autumnal berry lip, but for the eyes I opted for a dark glossy nude to compliment the berry lip.  I have managed to create a crisp lip line again, which I am pleased with, and this time the glossy eyes did not crease and smudge half as much as they did in my previous photoshoot, which is good.  I have worked with the conventions of beauty to produce this set of images, by creating a look that makes both the eyes and lips stand out to the viewer.  This has been done by using a bold colour on the lips and glossy textures on both the eyes and lips.  Having the model's hair sleeked off of the face also draws more attention to the make-up.

Having no photographer available again meant that I had to shoot the images myself, which was not disastrous as  I am more confident behind the camera since the beginning of the production of this project.  I have managed to achieve clear images, however some of them are a little darker than I'd have liked, as I had trouble getting the right balance between the flash and the brightness of the image.  Therefore, in post-production I plan to increase the brightness and the levels of the images to improve the balance and the visibility of the make-up.  I will also tidy up some of the model's loose wispy hairs and make her skin look a bit smoother, by taking out the shadows from spot scars on her forehead.

Monday, 18 April 2016

Still Life - Product Photoshoot


Today I shot some product imagery for my magazine, which went fairly well.  Having never done any still life photoshooting before, it was a tricky concept to grasp to begin with.  Some products produced better images than others, for example to moisturiser pot gave a clean image, whereas some of the lipstick shots were not fully focused in all areas of the image.  This is frustrating as I want the images to be perfect.

During shooting this series of images, there were a few problems that I had to overcome in order to continue the shoot and get the series complete.  Firstly, the flash would keep cutting out.  I think that this was because the bulb was overheating as someone had just done a shoot before me as well, but it meant that I had to keep turning everything off and leaving it for 10 minutes before I could continue to shoot.  This took up a lot of my time and meant that I had to skip a few of the products so that I would be finished in time for the next person to use the studio.  Another issue that I had was focusing the camera.  I had the lens set to Auto Focus, but it would not for some reason or another, meaning that I had to use Manual Focus.  This was okay at the time, however when I got home and was looking back through my images, I realised that quite a few of them were unfocused in areas of the image.

Although this was annoying, I still got some decent shots that I would be happy to use within my magazine.  When post-producing them, I will attempt to correct faults such as blurriness and brightness.

Friday, 15 April 2016

Hair Photoshoot

INSPIRATION
Here is a moodboard of inspiration for the hair look that I will be creating.  For the hair photoshoot, I will be making the model's hair straight to reflect the idea of the theme behind the overall trend.  I have decided that I will take some photos of the model with her hair just straight, and then others with her hair in a low ponytail.  This is to bring a small amount of variety to the hairstyles, and to give me more to work with when it comes to creating the content of my magazine.  As well as these two styles, I wish to create some imagery of hair movement.  To do this, I will use a fan.

http://www.dadefreeman.com/blog/commercial-hair-photoshoot
http://www.foundagrave.com/grave/ruslana-korshunova/
https://s-media-cache-ak0.pinimg.com/originals/a9/4f/af/a94faf2f76ce194f24c1e42ddb7e3cf3.jpg
http://fotogallery.donnaclick.it/bellezza/153615/acconciature-per-lufficio/4/


UNEDITED IMAGES


Here are some of the unedited images from the hair photoshoot that I produced.  The aim for this shoot was to achieve an outcome that showed hair movement and sleek hairstyles to represent the idea of conformity within society.  To represent this I opted for straight hair and a low ponytail, because they are more orderly than a wavy or curled style.

I am mostly happy with the outcome of these images, although there are some areas that need improvement.  Again, some of the images seem quite dark, so they will need to be brightened in post-production.  I am happy with the hairstyles that I created and I am particularly impressed with the moving shots at the top, however there are still some out of place hairs that will need to be cleaned up in post-production.  Also, my choice of model was not best thought through.  I chose her because she has such lovely long hair, however she was slightly awkward in front of the camera and did not always follow my direction correctly.  She also has very red arms that show up as very blotchy on camera.  Had I noticed this sooner, I would have put make-up on them to correct the redness, however I did not so shall just have to try to do it in photoshop.

I think that these images represent that I have understood and worked well using beauty conventions.  The way that I have styled the hair shows this, and the hair movement images work in relation to hair adverts that are often seen on TV or in magazines.  However when creating the hair movement, we did not have a fan so we had to use bursts on the camera as the model swung her head back round to face the camera.  This took a lot of attempts to get right, however we managed it in the end.  Overall I am happy with the outcome of this photoshoot, and I think that I will be able to rectify the changes that need to be made in post-production to leave me with great images for my magazine.

Friday, 1 April 2016

Skincare Photoshoot 2

INSPIRATION
For this skincare photoshoot I want to focus on the idea of cleansing products, as opposed to how healthy your skin will look due to skincare, which is what the last shoot was focused around.  To create this effect, I will have my model in a bathtub full of milky water that will represent the cleanliness and purity of the skincare products.  For the make-up, I will create a very natural look and will use a bb cream instead of foundation, as I do not want it to smudge and rub into the bath and make the milk orange.  I will also have to consider mascara - whether to just use a clear mascara or a waterproof one.  And for the hair, I will just comb it back off of the model's face.  Whilst she will be in the bath, I will position the ends of her hair so that they sit nicely around her face to frame it, and I will try to make the hair sit on the surface of the water.

http://www.fashionstylemag.com/2015/beauty/beauty-tip-milk-bath/
https://makeurdaysfresh.wordpress.com/2014/11/23/milk-bath-benefits/
http://blog.missguided.co.uk/beauty/how-to-master-the-natural-look/
https://uk.pinterest.com/jon_howson/milk-photoshoot-inspiration/


UNEDITED IMAGES


Whilst at home for Easter, I created another photoshoot based on skincare.  This time I created the idea with my model laying in a bathtub of milky water, to represent cleansing the skin and for this series of imagery I managed to lock down a photographer for the day which I was really pleased about.  I think that if I had not of had a photographer's help, I would not have been able to produce this photoshoot because I do not have the knowledge or skill set to do photography without a studio setting.

Through using my understanding of the conventions of beauty, I was able to plan and produce this set of images to use for my online magazine. Having used minimalistic make-up and having the model in a milky bathtub shows the viewer clearly that the image is representing the idea of skincare.

Overall I am really pleased with the outcome of this photoshoot, however there are a few small things that could be tweaked in post-production.  A few of the images are a bit darker than I'd have liked to show a skincare range, so I will need to brighten a couple up.  Also the edge of the bath can be seen in a lot of the images so I will need to crop the images and blur out the edges to produce a great outcome.  Another small thing would be to clean up the areas of the face where the make-up had run slightly due to the model being in the bath for so long.

Thursday, 31 March 2016

Logo Designs

I sent my original logo idea over to my graphic designer for him to improve on for me to be able to use it on my website.  Below is what I received back.

My Original Design
Above is an improved image of the original idea for my logo.  The graphic designer has brightened up the background and lightened the shade of the lipstick marks that I used to create the prophecy ball in the background.  It is a lot better than the rough logo that I had made, and I prefer the font that he has used.

Graphic Designer's Designs
Here are four other designs created, that the graphic designer felt would work well with my concept for my branding.  I really like them all and feel that the simplicity of them would work a lot better for my magazine, rather than trying to make too much of a statement with the design of a prophecy ball being used.  Out of all four of these, my favourite is the top left, because it still uses the element of the lipstick stains from my original idea and it adds some colour to the brand.

After receiving the above ideas and being drawn towards the design that uses the purple, I asked for it to be mocked up with a white square and black writing as well.  Below is the outcome which I am also really happy with.  Having spoken to a select group of my target market, they agreed that this was the best design outcome produced.  Therefore, I think that this will be the final logo for my magazine.

Final Logo Design

Monday, 21 March 2016

Fragrance Photoshoot

INSPIRATION
Here is a basic moodboard of inspiration for my fragrance photoshoot.  The key element to this look will be the gel lighting, to create a moody atmosphere in the image.  The main colour gels that I want to experiment with are red, green and blue, as I think that these will work best as a combination.  To work with these colours, I will apply a shimmery orange lipstick to my model's lips.

https://uk.pinterest.com/dannilove09/color/
https://fstoppers.com/studio/shooting-color-gels-2723
https://modxchange.wordpress.com/2014/03/10/how-to-wear-orange-lipstick-this-spring/


UNEDITED IMAGES


The theme behind this photoshoot was to represent fragrance, so I decided to play with coloured gels to create different moods within the images.  I am happy with the outcome of these images, however I think that I could have been a bit more adventurous with the poses and stances for the model  had I been more prepared leading up to the shoot, as the images are all quite similarly structured.

Luckily one of my photographers was free to help me with this photoshoot, as I am not confident in using gels, and I think that the lighting looks really good, with thanks to my photographer.  I was really happy with the make-up that I had created for my model's face, however it does not show up greatly in the images due to the lighting.  Looking back, I think that we should have captured some images without the gels to give me a variety of choice when it comes to finalising my images for the magazine.

Overall I am fairly pleased with the outcome of these images, however there are a few changes that I would like to make in post-production.  Firstly, I would like to play with the lighting and see if I can make the make-up any more visible than it is in the unedited images, and secondly I would like to take out the model's nose stud and tidy up the wispy hairs around her head.  The images will also need to be cropped to take out the models top and the excess areas of background.

Friday, 11 March 2016

Skincare Photoshoot

INSPIRATION
This moodboard of inspiration for my skincare photoshoot shows natural looking skin with highlights and a neutral lip colour.  I think that when creating a skincare look, it is important that the make-up looks natural and not overdone, otherwise it would defeat the point of the look being about keeping your skin healthy without the need for make-up.  To go with the make-up look, I would like to create a plaited hairstyle to keep the model's hair off of her face.  This will allow me to really focus on her face and the make-up, and it will also incorporate the idea of the overall trend behind the magazine - structure.  I believe that braids represent this well because they are quite regimented and tight against the head.

http://www.thefairytalemakeupartist.co.uk/strobing/
https://www.listaddicts.com/top-7-best-summer-cornrow-styles-for-women-2015/
http://www.elle.gr/article.asp?catid=24964&subid=2&pubid=129833215
https://www.newbeauty.com/treatments/lip-enhancement/
http://www.illamasqua.com/gleam-in-aurora/
http://www.lifewiththechampions.com/wedding-day-beauty-look/


UNEDITED IMAGES


The theme behind this photoshoot is skincare.  I wanted to create a natural effect with the make-up to mirror the idea that skincare regimes are becoming more popular and that they can make someone's skin look better without having to wear as much make-up.  I feel that I have achieved the outcome that I was aiming for with the make-up, and I am pleased with the way that the skin looks fresh and smooth and I have worked with the conventions of beauty to achieve the imagery above by creating close-up shots of the face and adjusting the lighting so that the highlight really stands out.

For the hair in this image, I wanted it off of the face so that the focus would be on the skin.  I opted for cornrow braids, as they took the hair back but still portray the idea of structure, being in regimented lines down the back of the head.  I am happy with the braids and the way that they sit, however the model's hair was quite layered and you can see these layers falling out of the braids in some of the images and there are also little fuzzy ends of hair surround the braids.

In post-production, I plan to brighten the images slightly to really show off the glow of the skin.  I will also be cleaning up the loose fuzzy hairs, in order to achieve the high quality, clean cut imagery that I want to publish in my magazine.  I will also crop some of the images, so that it is focused just on the face and the skin.

Lip Photoshoot

INSPIRATION
Here is a moodboard of inspiration for my lip photoshoot.  I want the shoot to focus on the trend of dark lipstick shades for Autumn, so I plan to use Urban Decay's Revolution Lipstick in Shame, as shown in the image above.  To compliment the lipstick shade, I would like to create a soft gold smoky eye, using a similar shade to the pigment shown in the moodboard.  I think that the combination of this eye and lip look will create a nice image that mainly focuses on the model's lips.  To accentuate this and make sure the focus is on the lips, I will have the model's hair pulled off of her face.  Similarly to the hairstyle seen in the image, but probably a bit tighter to the head and not as pouffy on top.

https://uk.pinterest.com/abco11/beauty/
http://www.polyvore.com/eye_shadow/collection?id=463738
https://uk.pinterest.com/explore/it-cosmetics/
http://www.urbandecay.co.uk
http://www.estanbul.com/mevsime-uygun-5-koyu-ruj-onerisi-437335.html
http://www.elle.com/beauty/makeup-skin-care/tips/g8585/gold-makeup-eyes-lips/
http://www.allfashionnews.net/wp-content/uploads/2015/09/How-to-Use-Dark-Purple-Lipstick-Well.jpg


UNEDITED IMAGES


Today I did a photo shoot for one of my lip looks, which I am really happy with.  My photographer was unavailable so I shot the images myself, but I feel that they have come out well.  The theme of this photoshoot was to focus on the lip, and the trend of dark Autumnal shades.  The lip line that has been created is clean without a bleed, which I am impressed with, and I feel that the bronzed shades of eyeshadow work well with the lip colour in order to make it stand out.  Here I have worked with the conventions of beauty in order to create a set of imagery that draws your attention to the model's lips.  I have done this by creating a neutral make-up look with a bold coloured lip that stands out most within the imagery.  Having the hair off of the face also allows the viewer to focus more on the make-up, and in particular the lip shape and colour.

The hair I am disappointed with.  My aim was a smooth, sleek bun with small wisps of hair falling around the front of the face, however my model had very think hair which was difficult to get as sleek as I had wished.  The wisps of hair also look a lot messier than I had originally envisioned, therefore some of the stray hairs will need to be edited out in post-production.  Overall, I am pleased with the outcome of this photoshoot, however there are parts that need to be worked on in the post-production stage in order to achieve a cleaner image, ready for my magazine.

In post-production I do not plan to do a lot to the images, because I do not want to over work them.  I would like to brighten the subject of the photos slightly in order to make the make-up really stand out, and I will tidy up the extra wispy hairs that can be seen around the side of the head.